PINWHEEL CONSTRUCTION
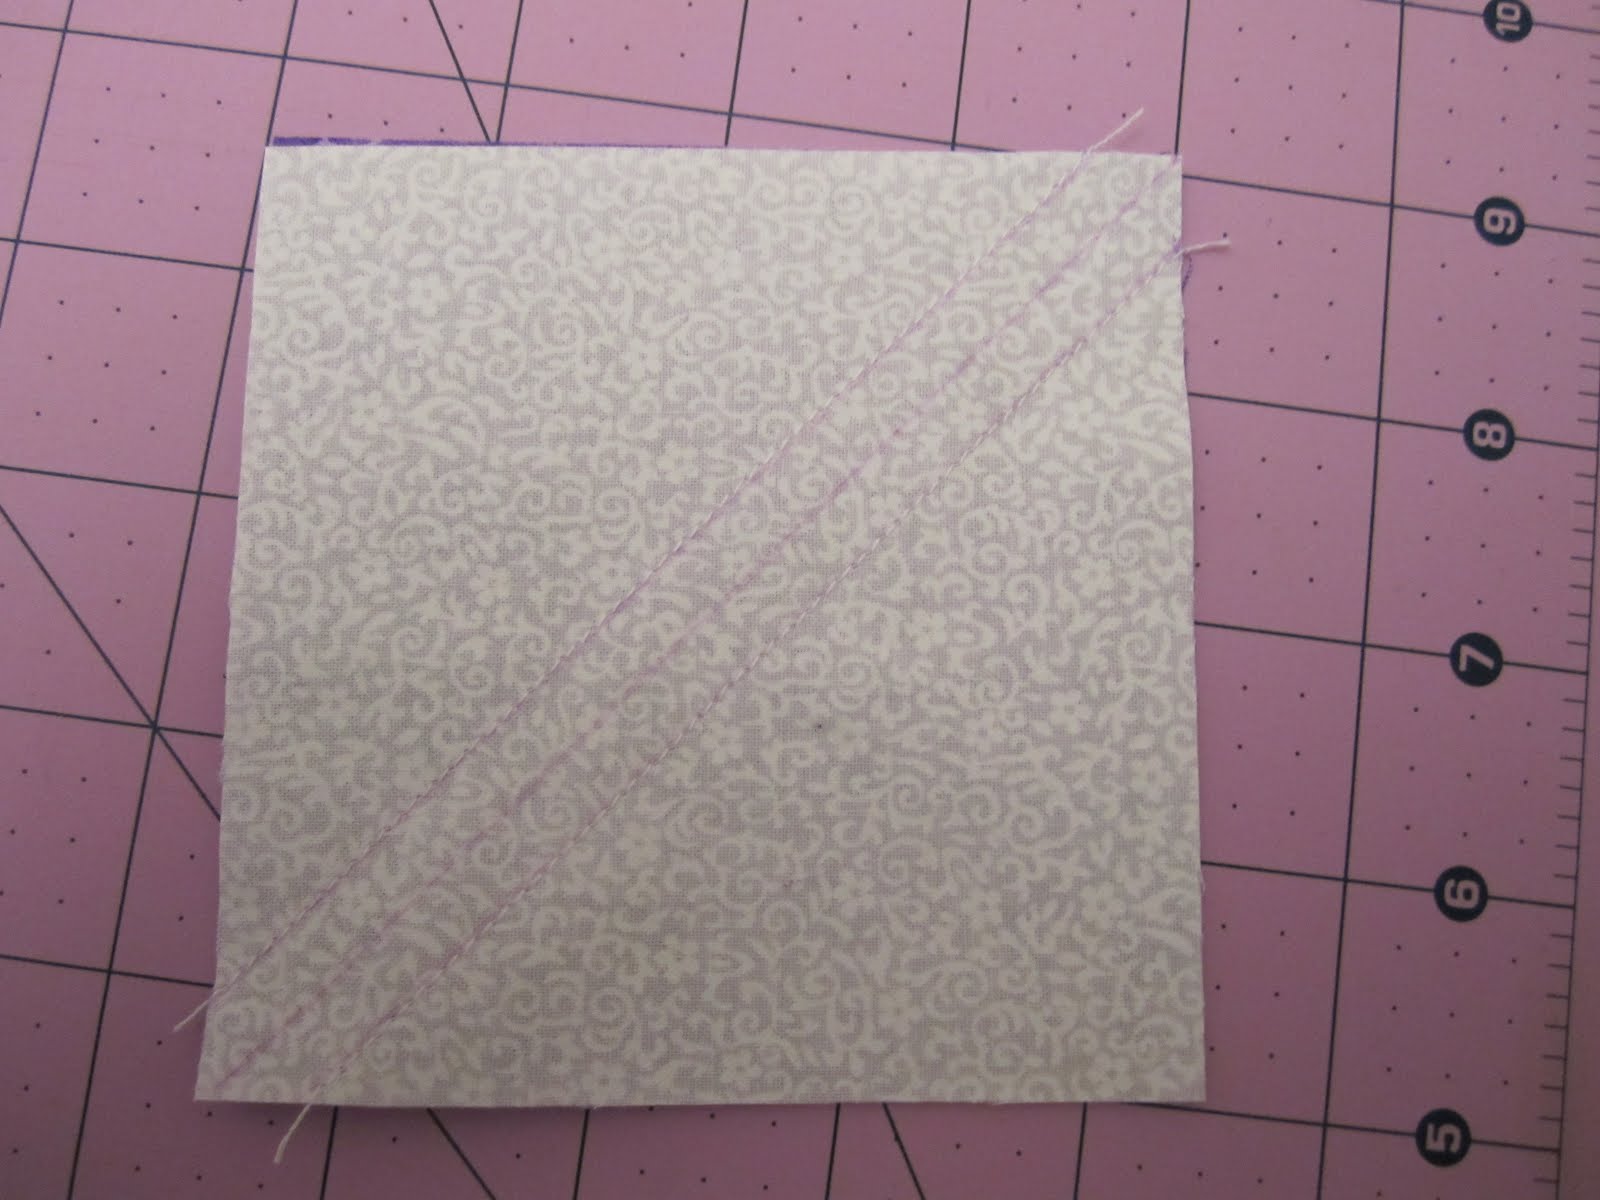
1. On the wrong side of your fabric, line up the 45 degree diagonal line on your ruler along one side of your 4x4 square. Match the opposite corners along the ruler’s edge.
2. Mark a line across the square using a Mark-B-Gone pen making two triangles.
3. Mark a line ¼ of an inch above and below the center line.
4. The center line is your cut line and the two lines above and below this line are your sewing line.
5. Match together the right sides of your fabrics and pin.
6. Sew each sew line previously marked.
7. Using a ruler, cut along the center cut line. If your Mark-B-Gone pen recommends it, lightly spritz the lines with water until the line disappears. Often times, heat sets the color and you won’t want that on your finished piece.
8. Set your seam by pressing the seam on the wrong side of the fabric before opening the triangle.
9. Open the triangle to make a square and finger press lightly making sure the seam on the back will be hidden behind the darker fabric.
10. Press the center of the open square on the right side of the fabric.
11. After pressing, make sure that the seam is opened tightly but don’t tug on it so it doesn’t stretch.
12. Flip over to the wrong side to make sure that the seams are laying down evenly.
13. On the cutting mat, line up your ruler along the edge and trim off the little pig ears.
14. To trim up each triangle to a 3.5” x 3.5” square, line up the ruler from corner to corner using the center seam as your guide.
15. Mark a small center line with a pencil.
16. Find the center point on your ruler for ½ of your final desired measurement and line it up on your pencil line. In this case, the ½ point is 1 ¾ inches.
17. With your ruler lined up, trim the edge around your ruler.
18. Spin the square around and do the same to the other side. It is easier to use the little yellow L along the 45 degree line to line your square up. Make sure you are lining it up for the right measurement (3.5” x 3.5” in this case).
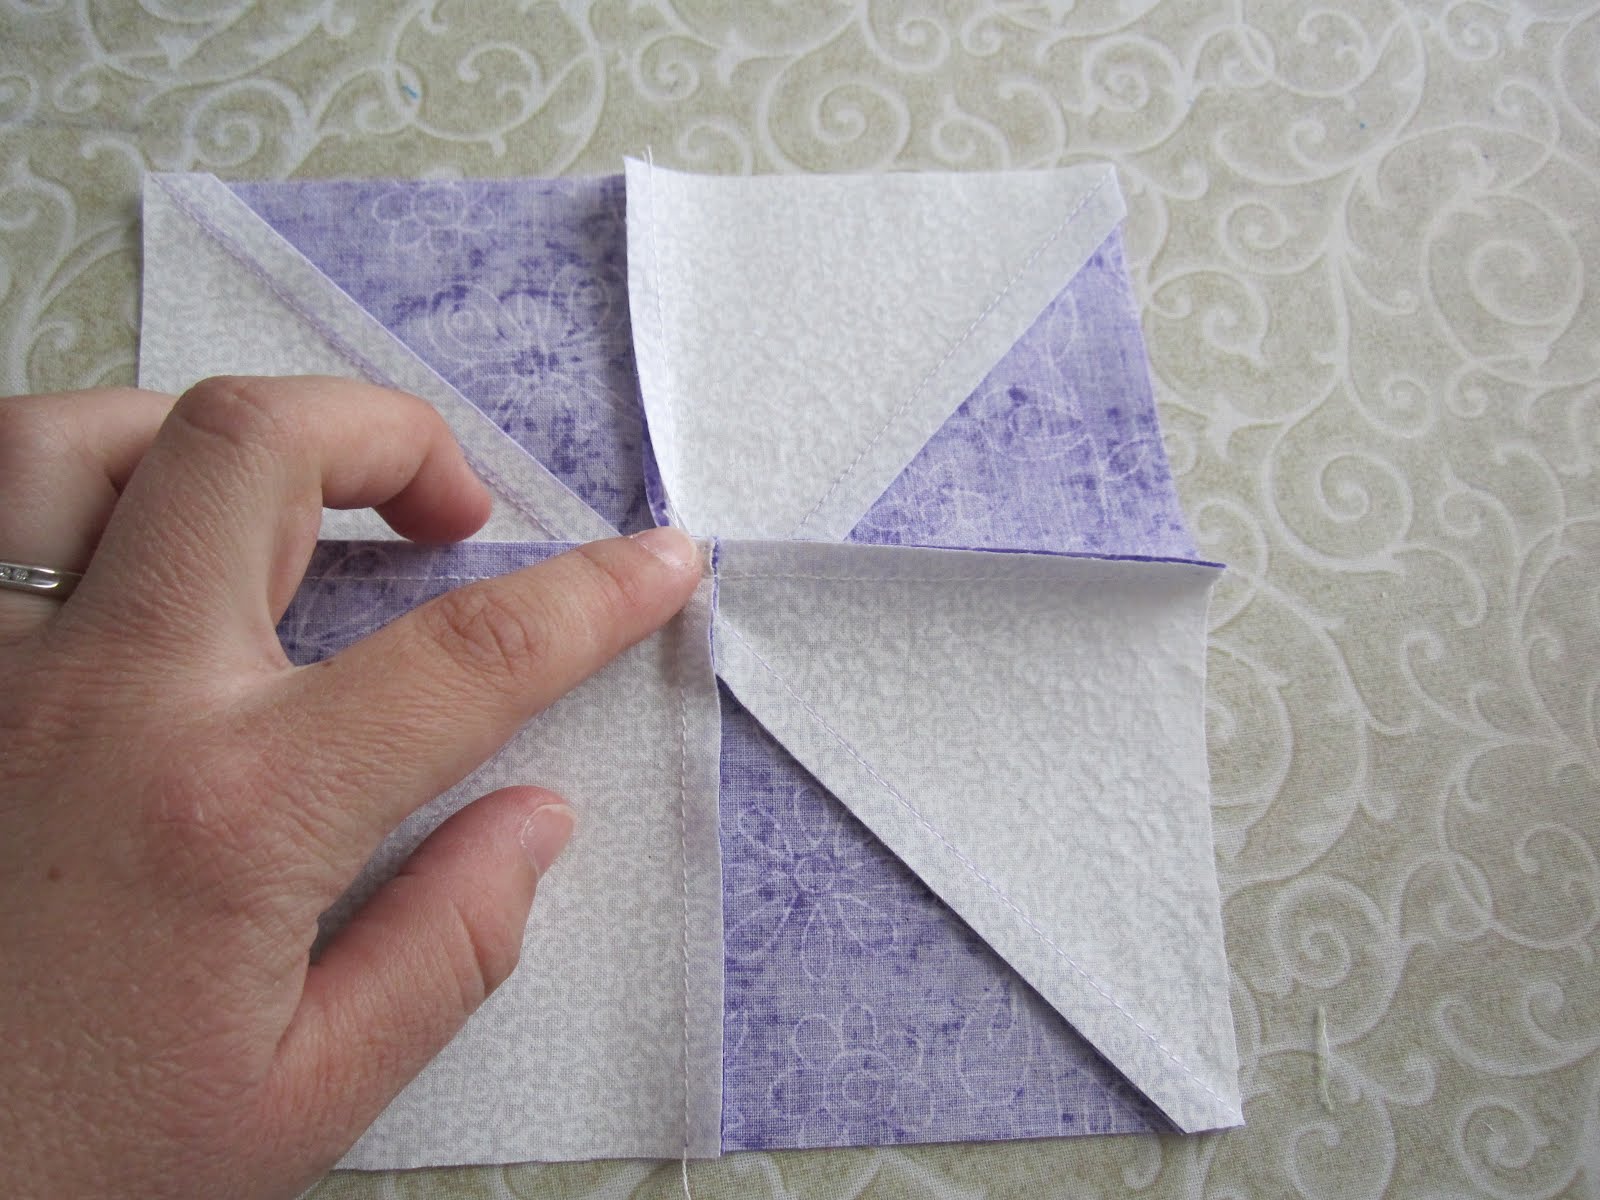
19. Set out your newly formed triangles into your pinwheel pattern.
20. Fold over the squares on the right onto the ones on the left, right sides together.
21. Nest the seams. Line up each square by matching the center seams together. If snugly placed together, the seams should form a little pocket.
22. PHOTO NOT CORRECT: Place a straight pin through the seams of each triangle. Then run a 1/4 inch seam along the joining side. Pin multiples at a time then chain piece to reduce your sewing time.
23. After joining the two triangles, press as before: 1. Set seam, 2. Finger press the squares open to the dark and 3. press with hot iron.
24. Flip rectangles and ensure seams are pressed flat and appropriately.
25. Again, lay out your pinwheel and this time, fold the top rectangle down onto the bottom rectangle.
NESTING PINWHEEL CENTERS
Method #1 (pin nesting): Nest as you did for the triangles by snugly fitting the two center seams together and pinning. Then run a ¼ inch seam along the joining side.
Method #2 (machine nesting): Line up the top edges of each triangle and start a ¼ inch seam.
After 3-4 stitches, stop. Grasp the bottom rectangle and push it up against the presser foot.
Slide the top rectangle toward the bottom rectangle until the two center seams stop (or lock) into one another.
Finger pin (or hold tightly without pushing/pulling the fabric) and resume sewing the ¼ inch seam. Once the center seam is under the needle, stop and readjust the bottom portion of the rectangle to line up along the right edge without pulling. Then finish the seam.
26. Open and check to make sure your center seams line up BEFORE pressing.
PRESSING THE CENTER OF A PINWHEEL
The center of the pinwheel will be really bunched and won’t lay down evenly no matter how much you try to iron it into submission {picture coming}. In the end, it will make your quilt top unevenly bunched. I recommend using the following Eleanor Burns Technique.
27. Prior to pressing, pull out the last 3-4 stitches at the end of each pinwheel center. Essentially back to the ¼ inch seam on each triangle (see steps 6-8 on
http://www.quiltinaday.com/freepattern/patterns/MerryGoRound_12.pdf).
28. Finger press the center open by pushing one side of the pinwheel up and the other side down.
The center will make a little pinwheel of the edges.
29. Press from the wrong side of the fabric first, then flip and press the right side of the fabric from the