Friday, June 22, 2012

UFO-Donation Quilt

Awhile back, I posted a log of all of my UFO's. It's really been bugging me that I have so many unfinished projects and I refuse to start new ones until the only ones are done. So when my quilt guild issued a UFO challenge where you provide a list of your UFO's then get an entry for a prize pack for each UFO you finish this year... I jumped on it.

Because of the requirements, only some of the projects on my UFO log qualified. Those that did are 1) The Little Gem (currently missing after move) 2) Donation Quilt 3) Log Cabin Star 4) Dan's Airplane Quilt 5) Scrappy Happy 6) Christmas Lone Star 7) Country Americana 8) Galaxy Quest BOM 9) Black, White and Bright Block Swap 10) Red, White and Blue Block Swap and 11) Mariska's Tulip Pinwheel Quilt (started since UFO log post).

When I started looking through the UFO's to find a beginning point (since The Little Gem is missing), I wanted something that would be fairly easy to finish so I would feel a sense of accomplishment and be motivated to keep working. I landed on the Donation Quilt. It just needs quilting... I have previously machine quilted this quilt but when I turned it over, the quilting looked like swastikas. That was not acceptable to me so I ripped the whole thing out and that's how it landed in the UFO pile. Seems simple enough right?! So that's where I started. It took a few days but I decided on a quilting design that is pattern but not like the stars in the quilt. I found it on Quilting-Tidbits.com. I ended up marking the quilt incorrectly as I worked from the center down the quilt. The result is not noticeable and I have decided to leave it as this quilt is no longer a donation, the event passed. I will hold on to it and pass it to someone who would appreciate it, I just don't have anyone in mind at the moment. It's not quite done because I had to stop and work on something else more pressing (see Dyson's Weighted Blanket post) but will return to it soon. I am determined to finish this quilt.

Continuous quilting as it appears on the back of the quilt.

Up close look at the quilting on the front of the quilt.

I hopefully will have this done by the end of June and will be able to mark another UFO off the list.

Quilters Guild

I am so excited, I finally found and joined a quilters guild! Every place we've lived, the guilds have not been near my home or were not accepting new members. So this is a first for me.

After moving to Morgan Hill, I met a mom through my mom's group who quilts. She invited me to visit her guild, Piece by Piece Quilters Guild, for the March meeting where they held a member's showcase. I really enjoyed the meeting so I turned in all my paperwork and fees at the next meeting. I was named a guild member in May 2012.

The April speaker was a gentleman from the local sewing and vacuum store about machine care. I learned a lot about what not to do with my machine... I do a lot of bad things to it. I really enjoyed hearing neat little tips and hints on how to keep my machine healthy to minimize trips for service, which I will take advantage of as it can get costly to take your machine in every 30K miles.

The May speaker was very impressive! We had a visit from Mary Mashuta; she spoke about color. Some of her quilt examples and inspirational photos (of Berkeley area houses and cars) left me speechless. I immediately went home and looked up some quilt patterns that I could use to play with different color craziness. She is such a creative lady.

I've been participating in the guild's block of the month. Basically, we make a block based on the pattern chosen for that month and for each block we submit, we get one entry to win all the blocks made that month. The April block was a buttercup for which I made two. I really wanted to win that month as I loved the pattern but so many people participated that the odds were stacked against me. The lady who won got some AMAZING blocks.
My Buttercup blocks for April BOM drawing.
May's block was a Pinwheel in a box of which I made only one with a yellow with medium white polka dots and a white on white. The entries were very colorful and it would have been nice to win them but alas, I missed out again. June's block was a Floral Wheel and I just wasn't interested in winning, so I didn't make one.

I finally got around to making my quilt guild name tag. I am quite proud of the color combinations as it was made completely of scraps. The embroidery letters were done on my machine. I used a stabilizer but it still went a little crooked but I've never really messed with this function before. So for a first time, it's not too bad. Especially since the machine is a quilting machine, not a embroidery machine.

My quilt guild name tag.

Two meetings ago, I signed up to participate in the Breast Cancer Quilt. I've done a number of blocks before for various Breast Cancer Donation events. I am looking forward to participating in this event with my new guild. It is all that more special since it is a cause that is so close to my heart. Stay tuned for more on this.

I missed the June meeting because it was Bug's 3rd Birthday but I am looking forward to July's meeting, where I will get a chance to socialize at the Ice Cream Social.

Tuesday, January 31, 2012

Pinwheel Tutorial

PINWHEEL CONSTRUCTION

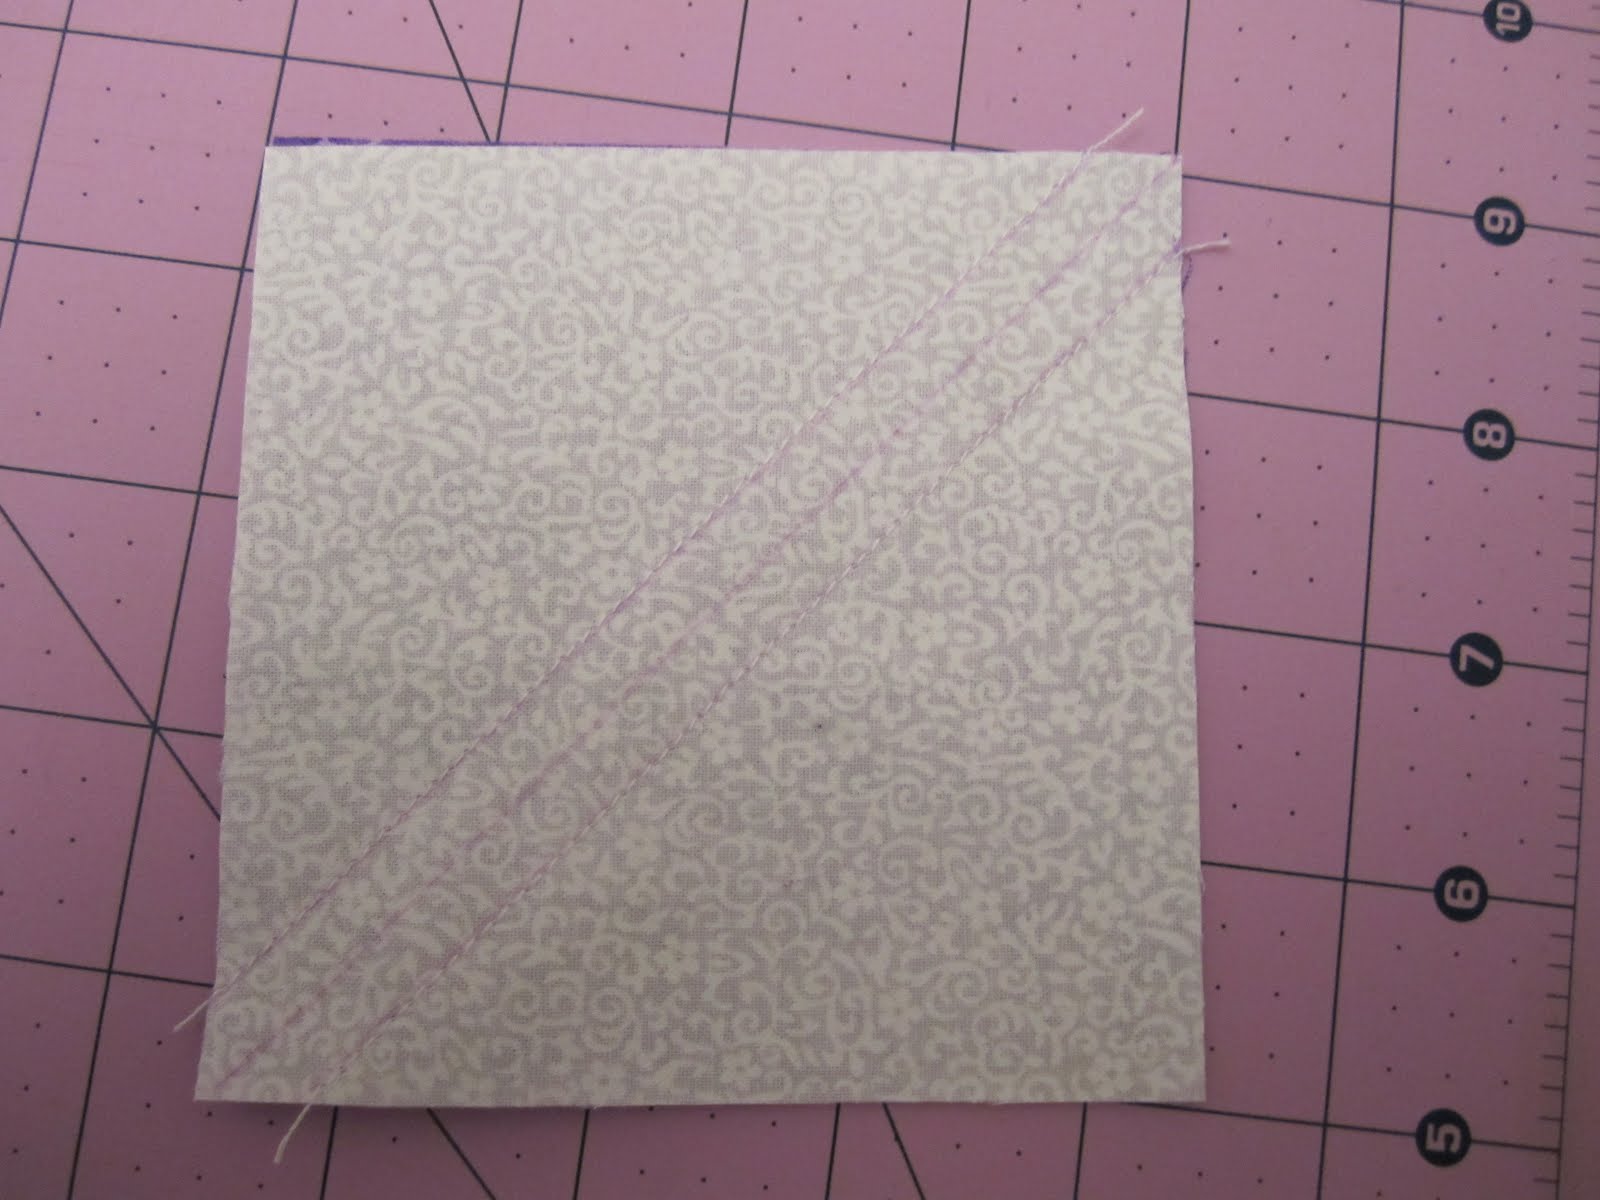
1. On the wrong side of your fabric, line up the 45 degree diagonal line on your ruler along one side of your 4x4 square. Match the opposite corners along the ruler’s edge.

2. Mark a line across the square using a Mark-B-Gone pen making two triangles.

3. Mark a line ¼ of an inch above and below the center line.

4. The center line is your cut line and the two lines above and below this line are your sewing line.

5. Match together the right sides of your fabrics and pin.


6. Sew each sew line previously marked.


7. Using a ruler, cut along the center cut line. If your Mark-B-Gone pen recommends it, lightly spritz the lines with water until the line disappears. Often times, heat sets the color and you won’t want that on your finished piece.


8. Set your seam by pressing the seam on the wrong side of the fabric before opening the triangle.

9. Open the triangle to make a square and finger press lightly making sure the seam on the back will be hidden behind the darker fabric.


10. Press the center of the open square on the right side of the fabric.


11. After pressing, make sure that the seam is opened tightly but don’t tug on it so it doesn’t stretch.

12. Flip over to the wrong side to make sure that the seams are laying down evenly.

13. On the cutting mat, line up your ruler along the edge and trim off the little pig ears.


14. To trim up each triangle to a 3.5” x 3.5” square, line up the ruler from corner to corner using the center seam as your guide.

15. Mark a small center line with a pencil.


16. Find the center point on your ruler for ½ of your final desired measurement and line it up on your pencil line. In this case, the ½ point is 1 ¾ inches.

17. With your ruler lined up, trim the edge around your ruler.


18. Spin the square around and do the same to the other side. It is easier to use the little yellow L along the 45 degree line to line your square up. Make sure you are lining it up for the right measurement (3.5” x 3.5” in this case).


19. Set out your newly formed triangles into your pinwheel pattern.

20. Fold over the squares on the right onto the ones on the left, right sides together.

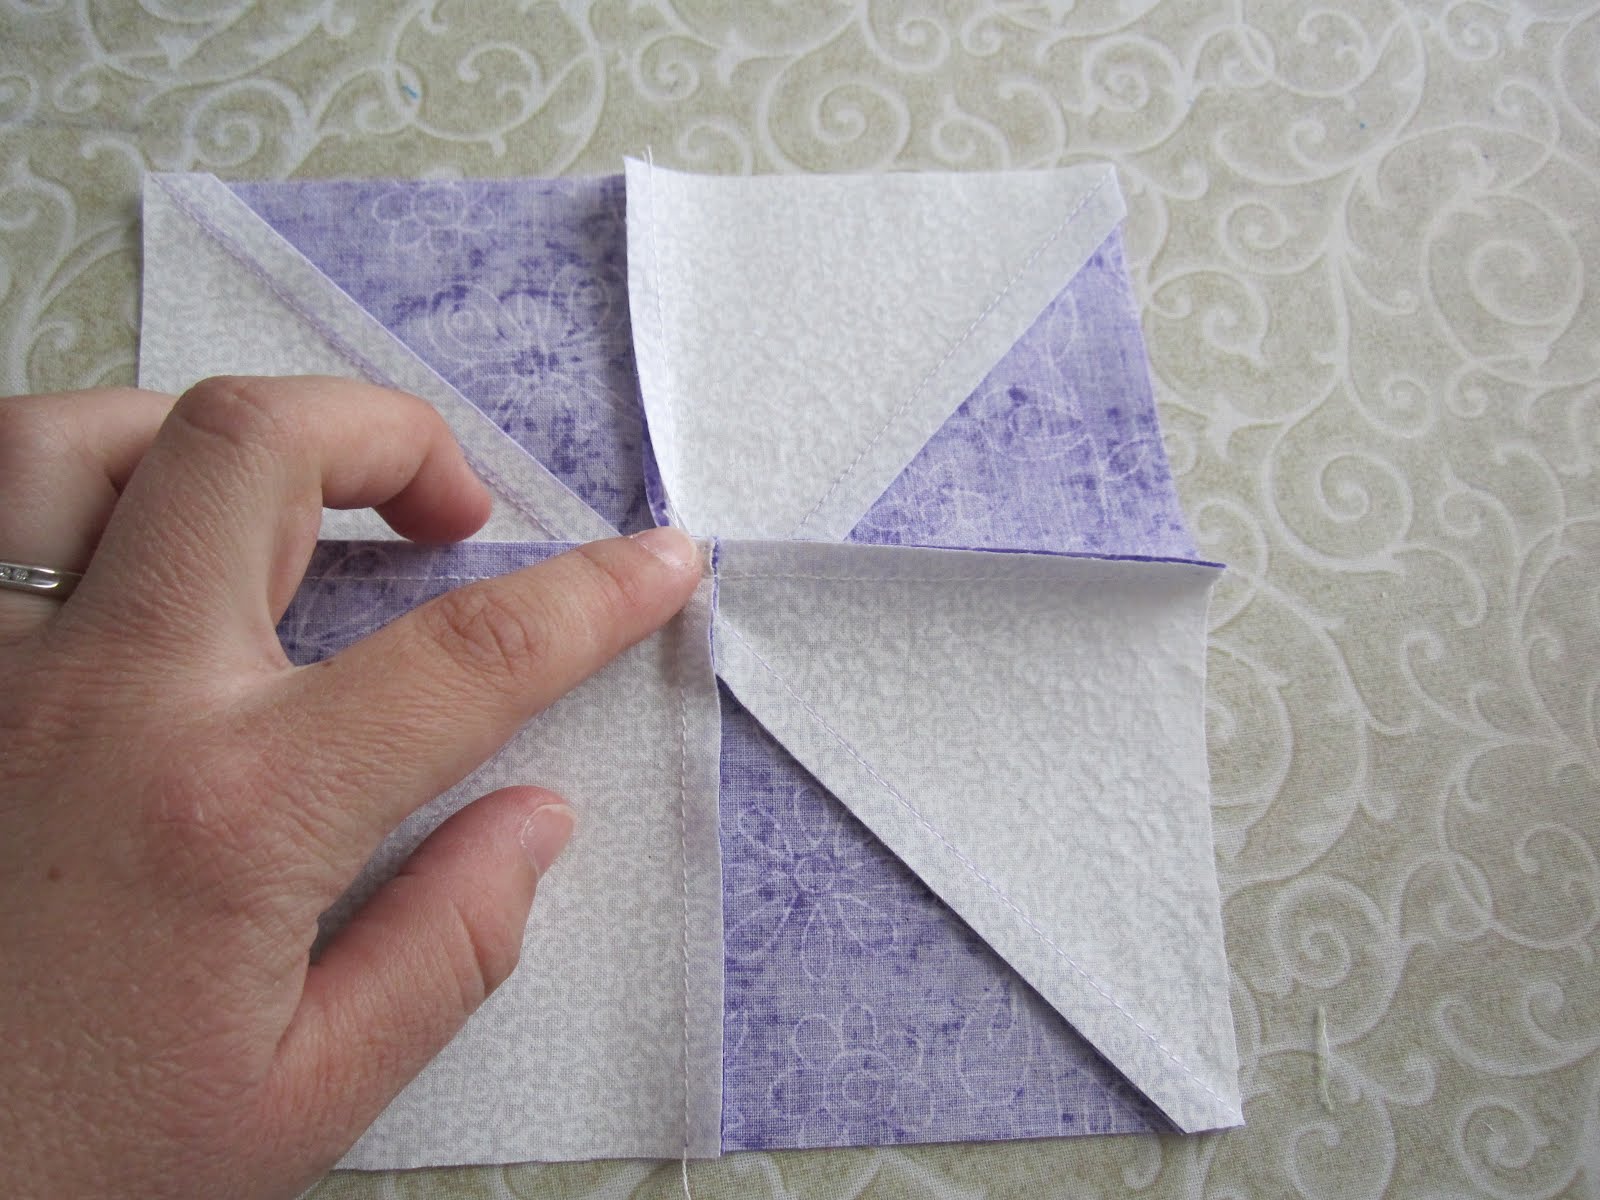
21. Nest the seams. Line up each square by matching the center seams together. If snugly placed together, the seams should form a little pocket.

22. PHOTO NOT CORRECT: Place a straight pin through the seams of each triangle. Then run a 1/4 inch seam along the joining side. Pin multiples at a time then chain piece to reduce your sewing time.

23. After joining the two triangles, press as before: 1. Set seam, 2. Finger press the squares open to the dark and 3. press with hot iron.

24. Flip rectangles and ensure seams are pressed flat and appropriately.

25. Again, lay out your pinwheel and this time, fold the top rectangle down onto the bottom rectangle.


NESTING PINWHEEL CENTERS
Method #1 (pin nesting): Nest as you did for the triangles by snugly fitting the two center seams together and pinning. Then run a ¼ inch seam along the joining side.

Method #2 (machine nesting): Line up the top edges of each triangle and start a ¼ inch seam.


After 3-4 stitches, stop. Grasp the bottom rectangle and push it up against the presser foot.

Slide the top rectangle toward the bottom rectangle until the two center seams stop (or lock) into one another.

Finger pin (or hold tightly without pushing/pulling the fabric) and resume sewing the ¼ inch seam. Once the center seam is under the needle, stop and readjust the bottom portion of the rectangle to line up along the right edge without pulling. Then finish the seam.

26. Open and check to make sure your center seams line up BEFORE pressing.


PRESSING THE CENTER OF A PINWHEEL
The center of the pinwheel will be really bunched and won’t lay down evenly no matter how much you try to iron it into submission {picture coming}. In the end, it will make your quilt top unevenly bunched. I recommend using the following Eleanor Burns Technique.
27. Prior to pressing, pull out the last 3-4 stitches at the end of each pinwheel center. Essentially back to the ¼ inch seam on each triangle (see steps 6-8 on http://www.quiltinaday.com/freepattern/patterns/MerryGoRound_12.pdf).

28. Finger press the center open by pushing one side of the pinwheel up and the other side down.

The center will make a little pinwheel of the edges.

29. Press from the wrong side of the fabric first, then flip and press the right side of the fabric from the

Pinwheels Plus

My darling friend Becky asked me for help putting together a pinwheel quilt using her rainbow swap fabric.  I politely obliged and drew up a pinwheel project on graph paper complete with pencil colorings, dimensions and a picture tutorial.


I had planned on purchasing fabric just to make a few pinwheels for this tutorial. In a moment of weakness at Joann Fabrics, I decided I was going to make a whole quilt of half pinwheels and half nine-patch blocks. I purchased fabric in some "girly" colors just in case Baby #2 was a girl because my stash is all "boy" stuff.

I initially planned to use this quilt in a design contest on my quilting forum so I had not plan on posting the tutorial or photos of this quilt publicly. However, Baby Girl's arrival kept me from completing it so I missed the deadline.  So I have decided to post the resulting tutorial here.

This project is not complete yet but I will share what I have to this point and will follow up with more pictures as I complete the tutorial and quilt.
Tutorials:
Pinwheel Block
Nine-patch Block
Finishing

Bargello progress

I am a bit late posting this update because Baby Boy's B-day was June 20, 2011 and his birthday party followed the 25th (I hosted family), then Baby # 2 arrived approximately 2 weeks earlier than we had planned.  Baby Girl was born on July 5, 2011 so the project has been on hold since.  This photo is of the first 12 runs; I have the next 6 runs (runs 13-18) cut and pinned.

Below is the Bargello quilt as it was June 17, 2011.


I look forward to picking up and finishing this project soon. 

Thursday, June 16, 2011

UFO Converted Finale


The UFO Converted completed. The photo on the left is the front and right is the back.


Examples of the machine quilting as seen on the back is the ivy pattern that appears in the green border on the front and a tulip pattern that is stitched into the pink border on the front.


The label is a green leaf print envelope held together by velcro that reads, "Quilted with love by Lacosta L. 2011."